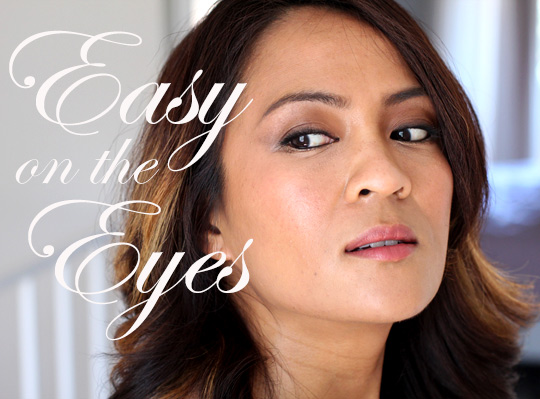
I don’t know… Today I feel very indifferent about my makeup, very noncommittal, like I don’t really have a strong opinion one way or another.
There’s a word for it, the way I’m feeling, but dang if I can’t recall what it is.
Neuter? No — that’s not it.
(Whoops, sorry Tabs! It had to be done.)
I think it has something to do with Switzerland in World War II?
Oh, shoot. It’s on the tip of my tongue…
LOL!
Neutral! The word is neutral. 🙂
Today I thought I’d share one of my favorite everyday eye looks, a brown, bronze and black neutral eye that I wear sometimes when I want to look polished and put-together.
Like many of my favorite looks, it’s an easy one that doesn’t require a lot of blending, and we should be able to knock it out in less than 15 minutes.
I’ll be using a mix products from MAC and L’Oréal, but you know how we roll here — feel free to use any other brands and similar colors you happen to have around.
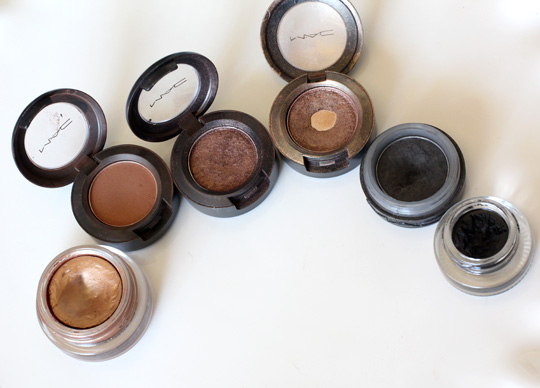
From the left: MAC Paint Pot in Indianwood, MAC Eyeshadow in Saddle, MAC Eyeshadow in Mulch, MAC Eyeshadow in Woodwinked, MAC Eyeshadow in Print and L’Oreal Lacquer Liner in Blackest Black
What’s that you say? You noticed my watch, and now you’d like to ask me what time it is? Well…
It’s prime time!
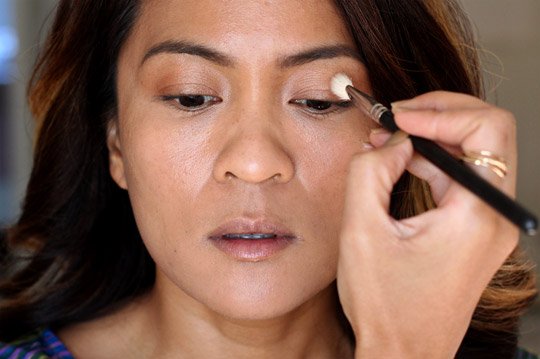
Let’s start by applying a base for our powder eyeshadows. How about creamy bronze MAC Paint Pot in Indianwood? We’ll apply that all over our lids with a finger and buff it out with a fluffy domed brush like the MAC 217.
That should really intensify the colors of the powder eyeshadows we’re about to layer on top.
The shape of things to come
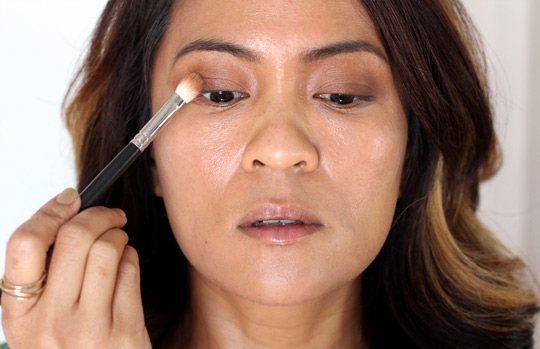
Next, let’s start giving some shape to our look by taking that same 217 brush (or one like it) and applying MAC Eyeshadow in Saddle, a matte golden orangey brown, from our lash line to just beneath our brow bone.
Try to concentrate more of the color closer to your lashes and lower lids.
Did I mention dimension?
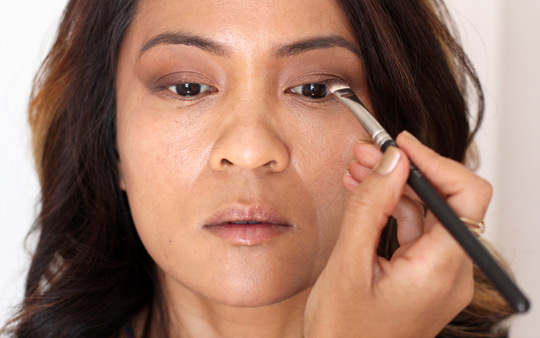
Next, load a flat eyeshadow brush like the MAC 239 with a shimmery reddish brown-bronze eyeshadow. I think I’ll use MAC Mulch…
Pat that on the outer half of your lids (the side closer to your ear), and blend out the edges with your blending brush.
The definition of soft
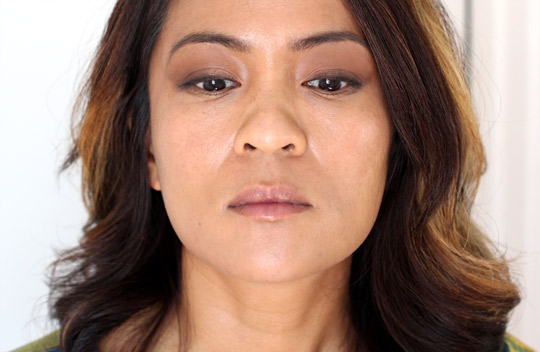
Since we’re aiming for wearable with this look, let’s add a soft, blended eyeliner by layering gray eyeshadow and black gel liner along our upper lash lines to define the eyes.
For that, we’ll start by applying a shimmery gray eyeshadow along our upper lash lines (maybe MAC Eyeshadow in Print?) with an angled eye brush like the MAC 266. Then, blur the edge with the flat eyeshadow brush you used a minute ago (in my case, the 239).
Let’s slightly darken the line by adding a very thin line of black gel liner along our upper lash lines with a pointed eyeliner brush. I used L’Oreal Lacquer Liner in Blackest Black with Sonia Kashuk’s Bent Eyeliner Brush.
Once again, let’s blend out that edge with our flat eyeshadow brush.
Now, we could stop right here, but if you want even more/better definition, you could take the same pointed eyeliner brush we already used, and your black gel liner, and line your upper and lower water lines, too.
That’s what I usually do.
Do you know the way to Brighton/brighten?
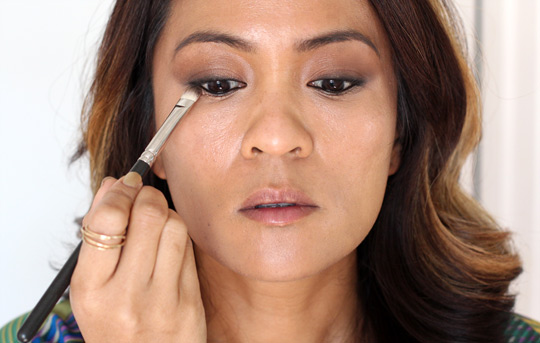
Almost there! To brighten the look a bit, use a paper town to quickly clean your MAC 239, load it with a bronze eyeshadow like MAC Woodwinked, and run it along your lower lash lines.
Welcome to the finals!
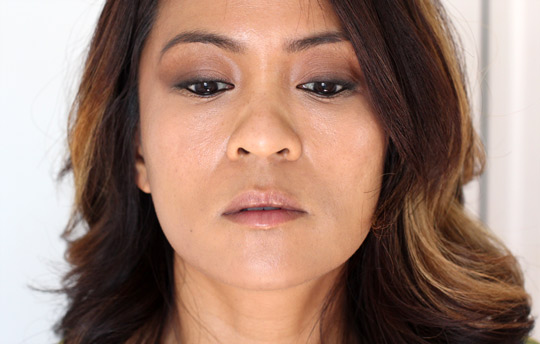
Good job. 🙂 Now I think I’ll fill in my brows and apply a little mascara to my upper and lower lashes.
The finished look

Cheeks: LORAC PRO Powder Cheek Stain in Coral Crush; lips: Laura Mercier Creme Smooth Lip Colour in Creme Coral

Your friendly neighborhood beauty addict,
Karen

Lovely lovely lovely! You keep making me want to rediscover my MAC shadows! I really need to pull them out more often!
Hi Tracy,
There are so many gems in the permanent line. Do you have Mulch? It would look really pretty on you, methinks.
That’s exactly how i feel. I started wearing Bronze this month. This look makes me kinda sad since I recently c realized I LOST Woodwinked. And yes Karen, Mulch is very flattering!
Love this look! I think I need to buy MAC Woodwinked and Mulch. They seem like great neutrals and great additions to my collection. Sometimes I like a neutral look too not using 10 different crazy colors.
Thank you, Katherine!
Both Woodwinked and Mulch are really great staples to have. I reach for Woodwinked practically every other day. It looks really pretty with Club, btw!
Karen, I don’t think you even need to fill in your brows. They are so even, and dare I say: twins instead of sisters! 🙂
Ahh, my crazy caterpillar brows! They have a mind of their own!
I love this look. I love Woodwinked. I think I will have to invest in this Loreal Liner. Funnily I have never used a gel eyeliner, I guess it will take some practice to do a perfect liine 🙂
I looove this look! Trying it out tomorrow, with my own similar shades.
I’d wear this look everyday! It’s perfect. It’s not to dramatic but you still look polished and pretty. I need more browns and that L’Oreal liner.
Such shades look pretty on you. My personal favourites are reddish/copper(ish) browns. Like RBR Bejewelled Skylark.
This is a beautiful neutral look with just a hint of drama–love it! I actually just rediscovered some of my neutral MAC shadows 2 days ago–specifically Cork, Symmetry, Naked Lunch, and Charcoal Brown, so I am definitely going to play with them and use your look as inspiration 🙂
SUCH a pretty, office-friendly look! I’m totally hooked on this series! Your skin looks FLAWLESS in these pics, and I adore the lippie!
Love it! So effortless, but really pretty.
Great step-by-step tutorial, Karen! I like seeing the corresponding photos and watching the look evolve from beginning to end. 🙂
oooh I love this look – its so wearable!
This is so pretty and you make it look so easy. I totally want to try it though.
I love Saddle! It was my second MAC shadow and it’s so under rated. I use it in the crease with Wedge all over the lid and shroom on the brow bone.
I have become a Mac-aholic since reading your blog. I bet sales have went up from your readers alone!! Mac should send you free products or something for all the addicts you are creating! LOL
Loved it! So very wearable for an everyday look….
Gorgeous, Karen… Can’t wait to try this soon!
i have to get mulch! haven’t heard much about the shade, but its sure got my attention now!
Karen, I love love love your tutorials! I’d love to see a look that’s suitable for school (Middle to high school, not college) someday 😀