• Skip to main content
  • Skip to primary sidebar

Makeup and Beauty Blog | Makeup Reviews, Swatches and How-To MakeupMakeup and Beauty Blog | Makeup Reviews, Swatches and How-To Makeup

A beauty blog blooming with fresh makeup reviews, swatches and beauty tips from your friendly neighborhood beauty addict

  • Home
  • About
    • About
    • Contact
    • FAQ (Frequently Asked Questions)
    • Advertising & Media
  • Categories
    • Product Reviews
    • Makeup
    • Skincare & Fragrance
    • Style & Fashion
    • Hair
    • Nails
    • Tips & Tutorials
    • Just for Fun
  • Brands
  • Store

Search Results for: 4-step

4-Step Lavender Lids

January 21st, 2022 by Karen 2 Comments

laura mercier orchid ilia cool nude palette
It takes just four steps to get this lavender lid look

Easy eye makeup? YES, PLEASE. This four-step lavender lid has been my go-to all week long.

It involves a layering technique, which I think is fun and easy. You start with a shimmery cream shadow base, and then layer and blend a matte powder shadow on top. The result? A shimmery base that peeks through the matte for a soft, subtle shine.

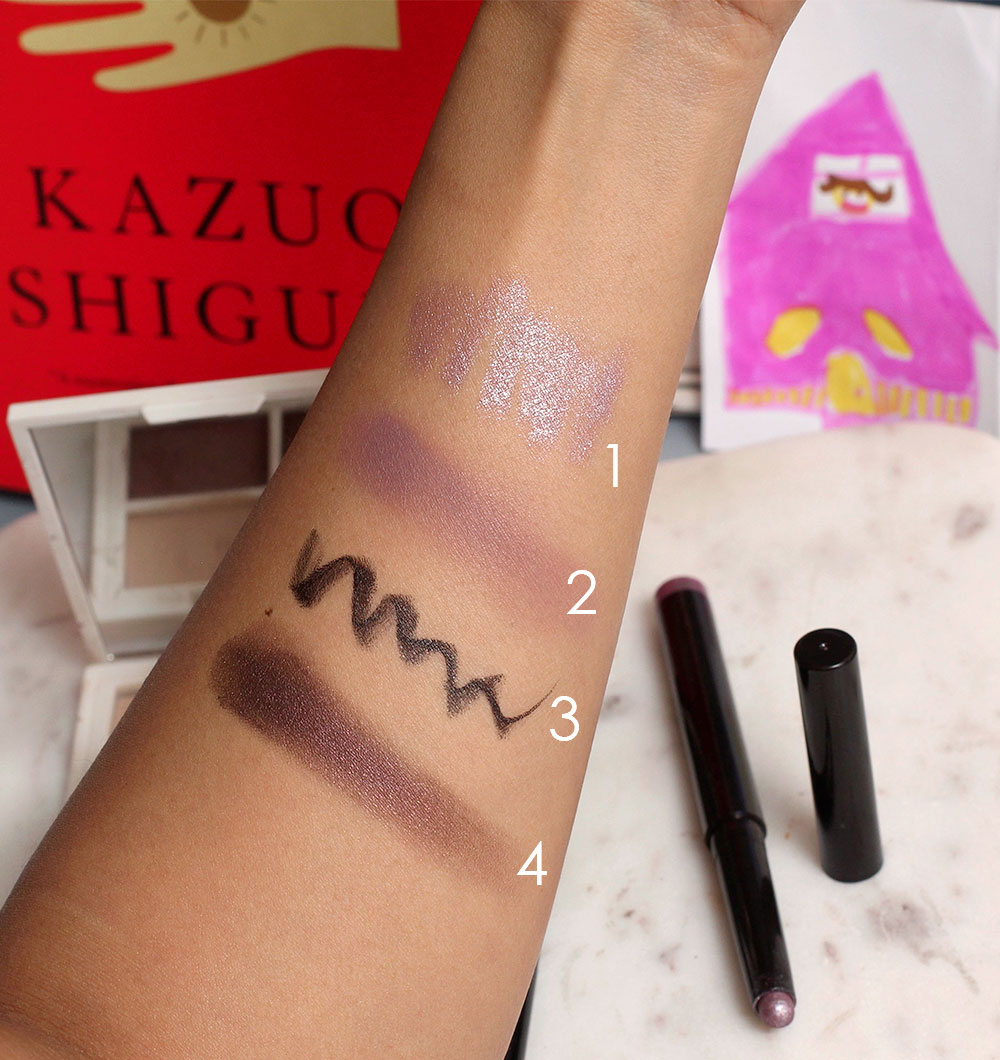
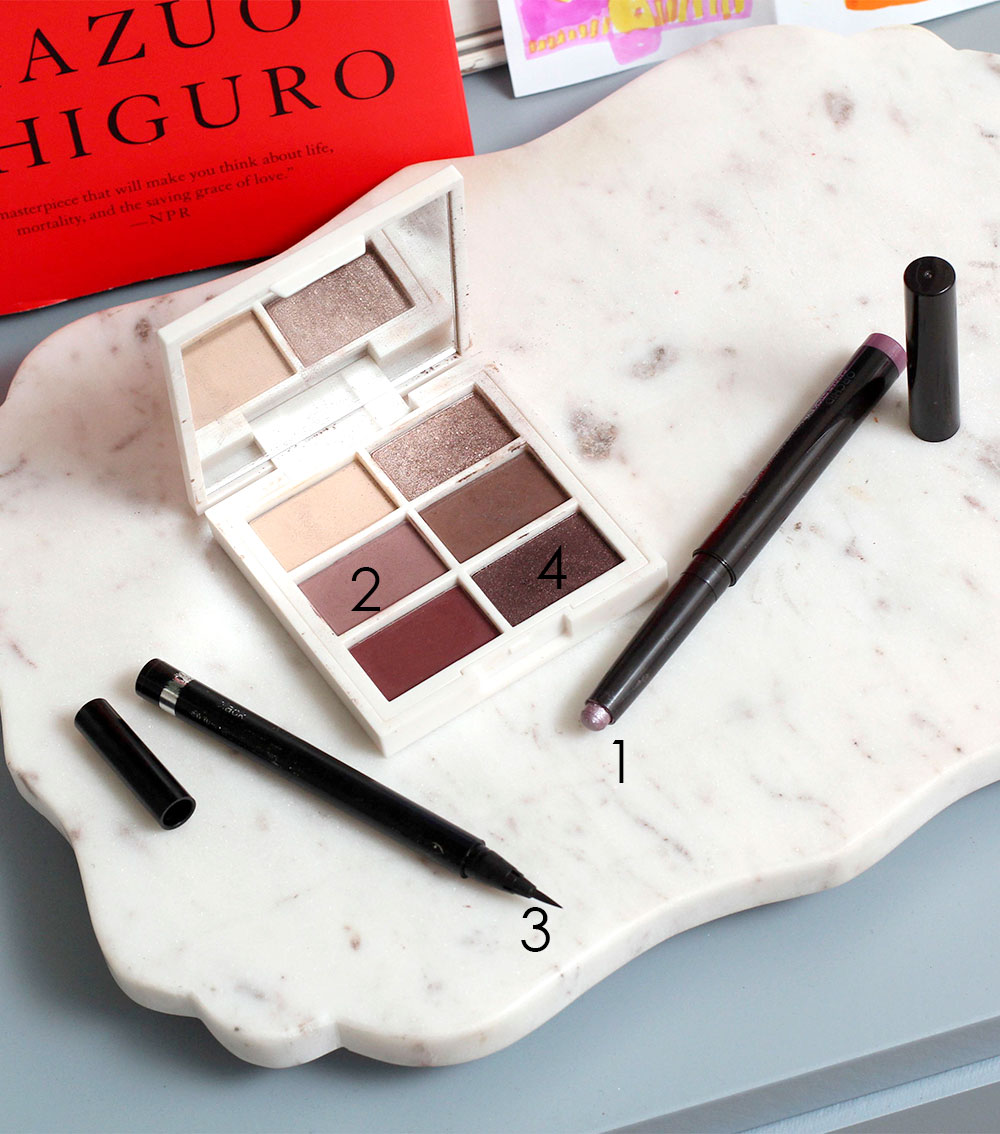
To get a similar look, you’ll need…

  • A shimmery cream eyeshadow, like Laura Mercier Caviar Stick in Orchid. I like this one because I can blend it easily with my fingers.
  • A matte lavender powder eyeshadow. This one’s from the Ilia Cool Nude Eyeshadow Palette.
  • A black liquid liner. I used my favorite Clinique Easy Liner in Black. The flexible felt tip makes it easy to control the width of my lines.
  • A shimmery dark purple powder eyeshadow. This one is also from the Ilia Cool Nude Eyeshadow palette.

Four steps to lavender lids

  1. Apply your cream shadow as a base, and blend the edges with a brush or finger.
  2. Layer the matte lavender eyeshadow directly on top, then blend.
  3. Line with the black liquid liner.
  4. Layer the shimmery dark purple eyeshadow on top of the liquid liner with an angled brush; blend the edges.

Add your favorite brow product and mascara, if you’d like, then get ready to shine!

laura mercier orchid ilia cool nude palette
1. shimmery purple cream shadow, 2. matte lavender powder shadow, 3. black liquid liner, 4. shimmery dark purple eyeshadow
laura mercier orchid ilia cool nude palette
1. Laura Mercier Caviar Stick in Orchid, 2. Ilia Teardrop (from the Cool Nude Palette), 3. Clinique Pretty Easy liner in Black, 4. Ilia Unravel Eyeshadow
laura mercier orchid ilia cool nude palette
The lip is Lila B. lip oil in b. elegant

Your friendly neighborhood beauty addict,

Karen

P.S. TGIF!

There are 2 comments on this post. Leave yours.

Categories: Ilia, Laura Mercier, Makeup, Makeup Tips/How To

A 4-Step Cute Lip Combo That Goes With Almost Everything: Layer MAC Soar Lip Pencil With MAC Patisserie Lipstick

June 26th, 2017 by Karen 6 Comments

mac patisserie soar prep prime lip
You can’t go wrong with MAC Lipstick in Patisserie ($17), Lip Pencil in Soar ($17.50) and Prep + Prime Lip ($17.50)

Here’s a neutral pink lip combo recipe I love because 1) it’s comprised of three products from the MAC permanent line, so the ingredients aren’t going anywhere, and 2) it goes with almost any and every eye look.

Here’s what you do…

1. Prep your pout with a layer of MAC Prep + Prime Lip.

mac prep prime lip
MAC Prep + Prime Lip ($17.50), a moisturizing, smoothing, colorless lipstick base.

2. Line and fill in your lips with MAC Lip Pencil in Soar.

mac soar lip pencil
Mid-toned pinkish brown MAC Soar

[Continue reading…]

There are 6 comments on this post. Leave yours.

Categories: MAC Makeup, Makeup

Oh, Beehive! A 4-Step Halloween Hair How-To

October 29th, 2010 by Karen 34 Comments

(Bzzzzz…)

Do you hear that? Um, I think it’s coming from my hair!

Marge came over today to help me brainstorm Halloween costumes and dish about the World Series (we both think the Giants will win in 6).

I’m still not sure what I’m going to do/wear to the Monster Bash tomorrow night, but if worse comes to worst, I could always wear some go-go boots with a mini-skirt and build a big Marge-inspired beehive.

What do ya think? This was my first one ever, and it was a lot easier than I thought it would be.

Hair’s how to get this obnoxiously high hairdo (mine measured 8 inches from my crown to the tip of the hive, yikes!) in four easy steps.

What you’ll need:

  • A lightweight volumizing mousse like Got2B Fat-Tastic Hair Thickening Plumping Mousse
  • A hairdryer, the lighter the better, because you may be holding it for a while (I like the T3 Featherweight and Rusk W8LESS)
  • A comb or brush
  • A maximum hold hair spray like Big Sexy Hair Spritz & Stay
  • A stocking, preferably one the same color as your hair
  • Something to fill the stocking with, like fabric batting, packing peanuts or air-filled packing cushions
  • HELLA bobby pins

Countdown to big hair in 3…2…1!
[Continue reading…]

There are 34 comments on this post. Leave yours.

Categories: Beauty Tips, Hair Keywords: halloween

Smashbox Reign Fall 2009: 4-Step Eye Makeup

July 7th, 2009 by Karen 38 Comments

smashbox reign fall 2009 karen 2

This year’s fall makeup collections have begun to trickle in, and the one I’m spending quality time with today is Smashbox’s new Reign ($19-48/item).

Inspired by England’s Tudor period (circa 1485-1603), a time that encompassed Queen Elizabeth I’s reign, the eight pieces feature shades of berry, peach, plum, black and champagne.

070709-smashbox-reign-fall-2009-small
Smashbox Reign Eyeshadow Palette in Majesty ($42), Lip Gloss in Crowned ($22)

For today’s 4-step eye makeup look, I grabbed the Smashbox Reign Majesty Eye Shadow Palette ($42), one of three eye palettes in the collection. It comes with three baked eyeshadows (a champagne, a reddish plum and a black), each with a dollop of matte shadow surrounded by a shimmery version of the same shade.

smashbox-reign-magesty-palette-swatches
Top row: shimmery shadows. Bottom row: matte shadows.

I was in the mood to wear something soft today but wasn’t sure if I could make the red shade work for a daytime look — that is, until I discovered that with enough blending the shade looks somewhat reddish brown (!).

smashbox reign fall 2009 eye

smashbox-reign-fall-2009-smashbox-eyemap

Smashbox Reign 4-Step Eye Makeup

  1. First things first. I grab my MAC 239 Eye Shader Brush and wet the head with a spritz of MAC Fix+ Rose. Applying shadows with a wet brush like this intensifies their color. I load the brush with the shimmery champagne shadow from the Smashbox Reign Magesty Palette and apply it over the entire eyelid and along my lower lash line.
  2. Next, with a Sonia Kashuk Crease Brush, I apply the red eyeshadow (mixing the matte with the shimmer) from the same palette into my crease, concentrating more of the color toward the outside (closer to the ear), and use a MAC 217 Blending Brush to soften the edges.
  3. Then, to make the whole look really pop, I apply a mix of the shimmery black and shimmery red shadows with a Sonia Kashuk Angled Eyeshadow Brush, drawing a thick line along the upper lash line and smoothing out the edges with a MAC 217.
  4. Finally, with the same brush and a mix of the shimmery and matte black shadows, I line the lower line.

[Continue reading…]

There are 38 comments on this post. Leave yours.

Categories: Face of the Day (FOTD), Makeup, Makeup Tips/How To

Easy 4-Step Eye Makeup with Illamasqua

July 2nd, 2009 by Karen 53 Comments

illamasqua sirens fotd final final

Hiya, ladies. I had fun with this week’s Benefit 4-Step Eye Look, so I decided to try another one — this time using products from the UK’s rising makeup star, Illamasqua.

More on the Illamasqua brand…

  • Illamasqua Lip Look: Thinking Outside the Box
  • Illamasqua: Makeup for Your Alter Ego
  • Let Illamasqua Sirens Seduce You with Color
  • Illamasqua, I Think I’ve Met My Matte

It’s a shimmery and smokey black, gray and bronze eye, and it makes heavy use of Liquid Metal in Enrapture (a shimmery bronze cream) and Powder Eye Shadow in Lestat (a matte black).

Blend till you can’t blend no more!

illamasqua sirens-eye closeup

Like the Benefit look from a few days ago, this look involves just four steps, but it can still take a while to complete, thanks to the amount of blending required. Seamlessly transitioning the black matte into the bronze cream shadow isn’t something I’d try if I only had a couple minutes to get ready, so if you’re gonna give this one a try, consider budgeting a few extra minutes to blend.

I had to restart this look twice, wiping everything off each time, and had to remind myself not to get frustrated. If you end up with black eyeshadow all over your face, no worries! Wipe it off and start over again. That’s the beauty of makeup, right? You can always start with a clean slate.

Illamasqua 4-Step Eye Makeup Look

illamasqua sirens map final

  1. I start the look with Liquid Metal in Enrapture applied over my entire eyelid and along the lower lash line with a MAC 239 Eye Shader Brush. I take care to concentrate most of the color on the lid, gradually decreasing the saturation of color as it moves toward the brow bone.
  2. Next, I use a MAC 217 Blending Brush to apply a light layer of Lestat into the crease, diffusing the edges and blending into the the bronze shadow.
  3. For a smokey effect, I pat several layers of Lestat onto the outer half of the eye, concentrating most of the color in the outer corner (the side closest to my ear), and blend away any harsh lines with my trusty MAC 217 brush.
  4. To finish the eye portion of the look, I load a MAC 219 Pencil Brush with Lestat, smudge it along the outer half of my lower lash line, and use my MAC 217 to gently diffuse the edge.

Illamasqua Sirens for Lips and Cheeks

For the rest of my makeup, I went with a hot pink and gold lip with shimmery golden peach cheeks. Illamasqua’s new Sirens collection helped. 🙂
[Continue reading…]

There are 53 comments on this post. Leave yours.

Categories: Face of the Day (FOTD), Makeup Tips/How To

Easy 4-Step Eye Makeup with Benefit Cosmetics

June 29th, 2009 by Karen 57 Comments

benefit-conmetics-fotd-062909-karen2

I love crazy, complicated eye looks as much as the next makeup junkie, but some mornings I just can’t get it together — I’m either running late or just plain lazy as all hell.

I’ve been wanting to do something with my eye makeup for a few days but haven’t wanted to do anything *too* complicated, so I limited myself to four steps.

Why four steps? I guess it’s my happy medium. Five steps feel like too many; three not enough.

Oh — I’m not counting curling my lashes or applying mascara as individual steps… I probably should, but I don’t like the sound of six steps as much as four. 🙂

Benefit four-step eye look

benefit-conmetics-fotd-062909-eye-2

The look is a shimmery neutral eye with a bit of gray, and I think it’s a great look for beginners.

benefit-conmetics-fotd-062909-eye-2map

Here’s how I get the look…

  1. To start, I apply Benefit Creaseless Cream Shadow in Samba-dy Loves Me (a shimmery peachy gold) on the lids and just up into the crease with my fingers, smoothing away any harsh lines.
  2. Next, using a Sonia Kashuk Large Eyeshadow Brush, I sweep Benefit Velvet Eyeshadow in Leggy (a shimmery peachy pink) over the entire eye.
  3. With the same brush, I pat Benefit Velvet Eyeshadow in Where There’s Smoke (a shimmery blackish gray) onto the lid and into the crease.
  4. To finish, I line my upper and lower lash lines with Benefit Bad Gal Waterproof Liner (a true black) and smudge out both with a MAC 219 Pencil Brush and Where There’s Smoke Eyeshadow.

eye-3

Cheeks and lips

You could pretty easily dress up this look with bold pink or red lips, but since I’m not really going anywhere special today, I shot for light and breezy with Benefit Posie Tint (a semi-matte peachy pink) on my cheeks and Benefit Full Finish Lipstick in Thrillin’ Brazilian (a shimmery golden peach) on my lips.
[Continue reading…]

There are 57 comments on this post. Leave yours.

Categories: Face of the Day (FOTD), Makeup Tips/How To Keywords: benefit

4 Steps to Clearer Skin With the Neutrogena #LetsSolveIt Campaign

August 28th, 2015 by Karen 12 Comments

neutrogena-4-steps-k

Somewhere between trying to squeeze in as much outdoorsy time as possible in the second half of summer, a bunch of stressful side projects, a particularly bad bout of insomnia (I keep waking up around the Witching Hour and then can’t fall back asleep) and the steady stream of ice cream I’ve been eating after dinner (even though I know what happens when I have too much dairy), I’ve started breaking out.

It’s nothing too bad…yet (knocks on wood), definitely not as bad as the huge humdingers I get sometimes along my jawline. These are just little whiteheads on my chin and around the edge of my forehead, and a couple of body breakouts on my chest and booty.

Yes, girl, booty — specifically, my left butt cheek, if you must know.

Is that TMI? Probably, but it’s not like I’m the first person (or the last) to get a painful pimple on their bum.

Anyway! When Neutrogena and Walgreens asked if I was down to switch up my acne-fighting game with their #LetsSolveIt campaign and take the quiz at SolveMyAcne.com, I thought, “Good timing!”

I’ve had great luck with Neutrogena skin care over the years, and I dig Walgreens (I used to go there on my breaks every day when I worked in SF), so I said “sure!”

Getting back into the swing of things at school after summer break is stressful enough. Who needs the ADDED stress of a bad breakout? Get expert skin care recs with the Neutrogena #LetsSolveIt campaign by taking the Acne-Fighting Quiz at SolveMyAcne.com, and feel fabulously confident in clearer skin.

First step: the quiz. And it’s not one of those quizzes that they say is only going to take two minutes but ends up taking 20. It really is just a handful of easy questions.

Like so…

Based on my answers, here are the four products the quiz recommended for me and my combo dry/oily skin:
[Continue reading…]

There are 12 comments on this post. Leave yours.

Categories: Neutrogena, Skin Care, Sponsored Post

Are You Dressing Up for Halloween?

October 25th, 2013 by Karen 30 Comments

A MAC-obsessed fall fairy, Oct. 2013

I think the fall fairy has potential, especially if I can make that blasted elf ear work, but truth be told, it’s not as comfy as last year’s crazy cat lady look. I mean…it’s hard to beat pajamas and a robe. And you know I’m all about the comfort. 🙂

crazy cat lady costume
Portrait of a Crazy Cat Lady, Oct. 2012

katy perry costume
Katy Perry, Oct. 2012

Wonder Woman's alter ego, a MAC makeup artist, Oct. 2011
Wonder Woman’s alter ego, a MAC makeup artist, Oct. 2011

Marge Simpson's quirky, makeup-loving sister-in-law, Oct. 2010
Marge Simpson’s quirky, makeup-loving sister-in-law, Oct. 2010

Back to the '80s, Oct. 2011
Back to the ’80s, Oct. 2011

Addicted to Lurve, Oct. 2009

Hmm… I wonder what I could do to really freak out my neighbors. That’s the end game, really. 🙂

The fall fairy has the big hair and the leaves and the muddy skin — that’s pretty freaky. I’m trying to picture myself like that handing out candy.

OMG, that frickin’ elf ear… First, it was too light toned, and then I couldn’t get it to stay put, and then I couldn’t keep it out of my hair, and then…gah! I gave up.

Right now it’s a tossup between fall fairy and crazy cat lady.

How about you? Are you dressing up for Halloween this year? Maybe we can brainstorm ideas. Lemme know what you’re thinking in the comments.

Your friendly neighborhood beauty addict,

Karen

P.S. TGIF!

There are 30 comments on this post. Leave yours.

Categories: Just For Fun

  • Go to page 1
  • Go to page 2
  • Go to page 3
  • Go to Next Page »

Primary Sidebar

Welcome to Makeup and Beauty Blog

Welcome to Makeup and Beauty Blog! My name is Karen, and I’m a freelance writer obsessed with makeup.

Makeup and Beauty Blog features daily product reviews, makeup tips and beauty news — like an interactive version of a monthly print magazine, except with occasional pictures of my cat.

Recent Posts

Sundays With Tabs the Cat, Makeup and Beauty Blog Mascot, Vol. 878

Makeup and Beauty Blog Monday Poll, Vol. 894

Makeup and Beauty Blog Monday Poll, Vol. 893

Makeup and Beauty Blog Monday Poll, Vol. 892

Makeup and Beauty Blog Monday Poll, Vol. 891

/* real people should not fill this in and expect good things – do not remove this or risk form bot signups */

Social

  • Facebook
  • Instagram
  • Pinterest
  • Twitter
  • YouTube

Featured Posts

Sundays With Tabs the Cat, Makeup and Beauty Blog Mascot, Vol. 771

Lady Unicorn

Weird Things I Like to Do

brows fill out beforehand

Before You Pluck or Wax Your Brows, You Must Do This

current bare skin status

What’s One Thing That Drastically Changed Your Skin for the Better?

Copyright © 2025 Makeup and Beauty Blog. Get in touch.